Record a New Session
You can use Panopto to record yourself on a webcam, record a narration of a Powerpoint slide or use Panopto for Screencasting.
- Follow the instructions for installing Panopto and click on the Create button in the Panopto section of your Canvas Course (See below). Then choose Panopto for Windows and then Open Panopto.
- The Panopto recording application will open, and you will be logged in
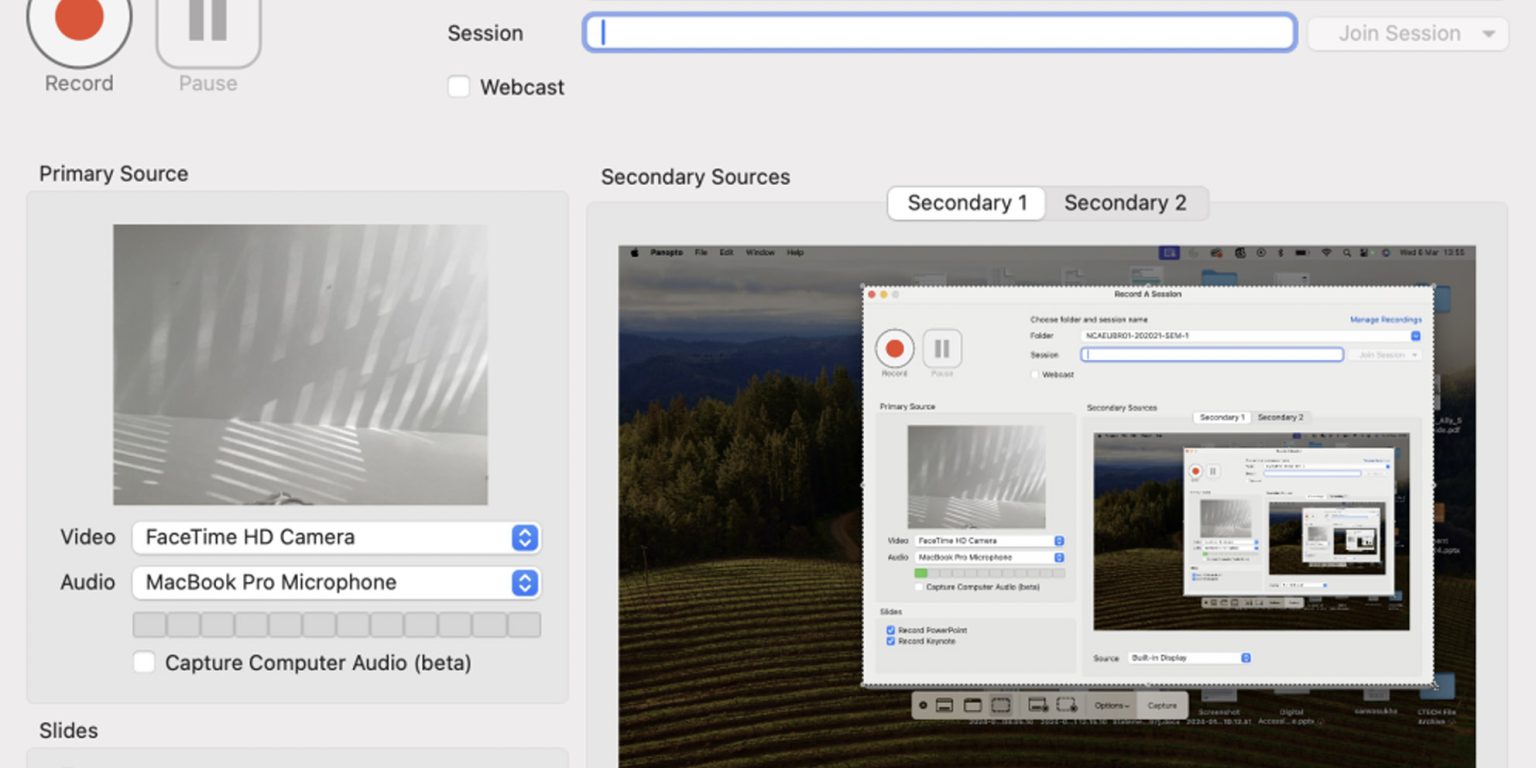
- Ensure the Folder is set to the correct course. If not, click on the drop-down list to show the different Canvas courses you have access to.
- Give a title to the video you are recording in the name section. A time and date is automatically applied, but it may make your videos more easier to manage and find later if you provide a name.
Recording Types and Options
Determine the type of recording you want to capture. For instance, can use Panopto to:
- Record yourself on a webcam
- Narrate a PowerPoint presentation
- Record your screen with audio
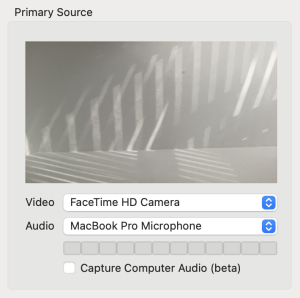
The most important step is to ensure that your microphone a) works and b) is set to the correct volume.
From the “Audio” drop-down menu select the microphone you wish to use. If you have just connected a USB headset (or another microphone), it should be pre-selected.
After selecting your audio, test your audio by talking in a normal voice to test the volume. You should see a few green bars appear as you talk. If you don't see any or see the red and yellow bars highlighted, adjust the volume by using the slider.
If this is your first time using Panopto, you may want to create a draft recording before uploading a video directly to your course. This will allow you to create a video and add it to a private folder within Panopto.
Web Cam Recordings
- For video recordings, select your webcam from the Video option and ensure your microphone is selected in the Audio option.
Powerpoint Recordings
- For Powerpoint narration, select None in the video option and select a secondary source using the Capture Powerpoint option and ensure your microphone is selected in the Audio option.
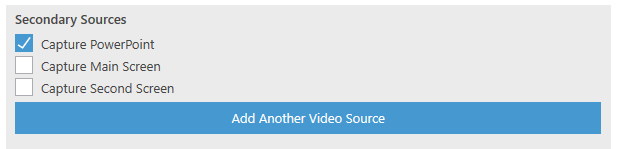
Screencasting
To capture your screen, select None in the video option and select Capture Main Screen in the Secondary Sources option and ensure your microphone is selected in the Audio option.
Hit Record
Once you've selected all the relevant options, hit the Record button to start your recording. You can Pause (F9) and Stop (F10) the recording using the large buttons. If you want to stop and re-start the recording, press the stop button and then select Delete and Record again.
Syncing Recording
Your recording will automatically be Synced with your Canvas course, making it available for students. Once the bars disappear, the recording is being processed by the server. You will need to wait for the upload to finish before logging out of your computer.
Your video will now appear in the Panopto section of your course.
It is recommended that you now make a Canvas announcement to make students aware of the recording and what you expect the students to use it for.